Flower Tutorial - tattered carnation flower
Right lets get down to business and make this very easy but pretty flower.
 |
| Flower using a cheap bought flower for the centre |

WHAT YOU NEED
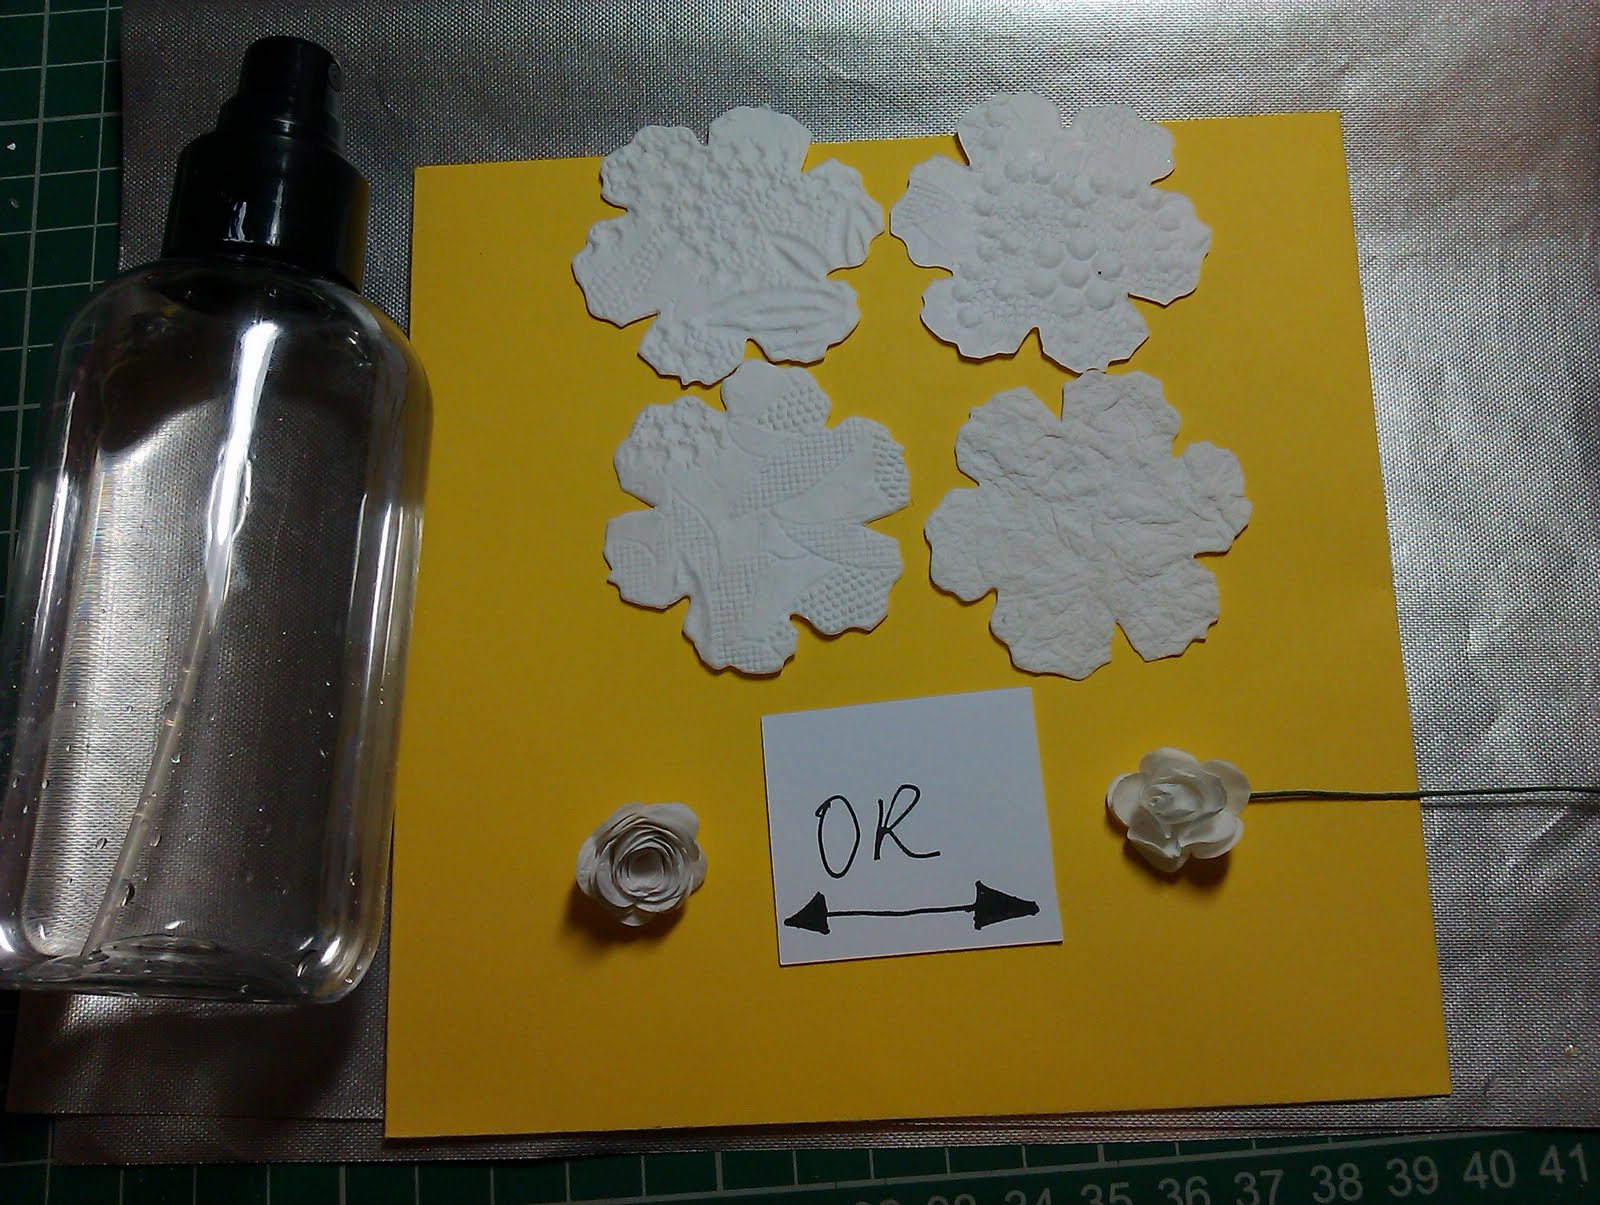
4 x the Tim Holtz Tattered Florals flowers - the 2nd smallest flower OR any type of 5 or 6 petalled flower you have. This is a very versatile flower and any flower die or punch you have is fine. It will just make it slightly different looking but you will still get the same affect with this technique,
A small rose flower either one you've made yourself or you can buy small cheap flowers in a pack for £1 at the works,
Scissors,
Glue.....hot glue, pva glue, silicone glue etc Whichever glue you prefer to use though I do not recommend a glue stick/pritt stick
Some sort of spray bottle with water in it, just to dampen your flowers,
Heat gun - not essential though,
Paper or cardstock. I happen to be using a mulberry type paper for this tutorial but use whatever you like, it can be coloured, plain, patterned, embossed....whatever you like. The choice is yours.
STEP ONE
 |
| 1. Take each flower and make a small cut between each petal |
The petals of the flower need to be a little longer. So take each of the 4 flowers and make a small cut between each flower. Don't go the whole way down to the middle of the flower or you will lose petals this way and they will fall out. See photo 1.
STEP TWO
 |
| 2. Lightly spritz each flower with water and scrunch into a ball |
Take each of your 4 flowers and lightly spritz with water. DONT SOAK the flowers. The water just helps the make the flowers easier to scrumple into a ball and gives more defined crease marks in the paper. Once you lightly spritz all 4, gently scrunch each flower into a wee ball. At this stage you can let them dry naturedly or use a heat tool to quicken the drying process. See photo 2.
STEP THREE
 |
| 3. Once dry, carefully unravel flowers |
Once your flowers are dry, very carefully unravel each flower being careful not to tear the petals. Do not completely flatten the flowers out as you want it to stay as crumpled as possible as the creases give the flower its shabby appearance. See photo 3.
STEP FOUR
 |
| 4. Glue centre flower to the first flower |
 |
| 5. Add the 2nd layer |
 |
| 6. Add the third layer |
 |
| 7. And finally add your forth layer and arrange petals |
Now its time to build your flower. Take the little centre flower and place some glue onto the underside of the flower. You can be generous with the glue as you want to mould the flowers around the centre flower. Place the centre flower onto one of the crumpled flower centres. See photo 4.
Place a blob of glue into the centre of the next flower and layer, making sure to alternate the petals. Do this for the rest of the flowers remaining. See photo's, 5,6 and 7.
Arrange your flower how you like it. Its at this stage that I would usually take a bit of cut n' dry and a Tim Holtz distress ink pad and brush over the flower and petals with the colour but only a bit. I still want some of the white paper showing through. It gives your flower a shabby chic look. You mat prefer to colour your flower prior to layering, its entirely up to you as to which you prefer,
As I said, you can use a bought flower or make your own flower for the centre. Here are examples of both. I personally prefer my own handmade flower but you may think different.
 |
| My handmade centre in the flower |
 |
| Bought flower for the centre |
 |
| Profile of the flower |
 |
| Projects where Ive used these flowers |
Notebook I made
 |
| Here I used it on a journal previously shown on my blog |
 |
| Here I added a pearl to the centre of the flower |
Thank you for looking, I hope this is useful and thank you for any comments and if you have any questions please ask me.
Toodles Noodles..... Loops xx

If you want, you can buy me a coffee which helps me maintain this blog so I can make bigger and better content, simply click on the image or copy the link below. No pressure at all, its just if you want to. Cheers big ears!
https://ko-fi.com/craftyloops
Wao...! Beautiful flower... I don't have dies.. I will hand draw the shapes and try this... Thanks for sharing dear..
ReplyDeletePriya
WOW! you've done it again Lee, this is stunning hun. I love your fab tutorials so clear and easy to follow. Thank You :o)
ReplyDeleteDonna x
Hi Lee thank you for the lovely tutorials so easy to follow i have been making your Prima like roses and have just put them on my blog
ReplyDeletethank you again can't wait to try this new one
Bernice x
Another fab tut! Great work Lee!
ReplyDeleteHugs
Dawn xx
Stunning flower Lee,fab tutorial.
ReplyDeleteWendy xx
These are beautiful Lee. xx
ReplyDeleteAnothe fab tut Lee..thanks for sharing kerry x
ReplyDeleteabsolutely beautiful
ReplyDeletemags x
Gonna have to dig out the tattered florals die again aren't I?! lol Gorgeous flower Lee and great tutorial again, thank you. Romayne xx DC
ReplyDeleteThis is fab,must have a go at it.Thanks.x
ReplyDeleteGreat Tuto! Your flowers are Fab! Love the notebook too. Hugs, kissinia
ReplyDeleteand a very yummy flower it is too on my lubberly journal you made me Lee xxxxx i love it xx
ReplyDeletebeautiful flowers lee. it looks ever so familiar. now where did i see one of those??
ReplyDeletekathleen mc x
Pretty, pretty, pretty. You are so talented.
ReplyDeletexxx Monica
j'adore
ReplyDeletemagnifique
ReplyDelete